
The Best Vegan Waffle Recipe (Crispy, Fluffy, and Foolproof)
UpdatedWaffles are one of those breakfast foods that feel a little fancy but are actually super simple to make. And the best part? You absolutely do not need eggs or dairy to get that perfect crispy-on-the-outside, fluffy-on-the-inside result. This vegan waffle recipe is about to become your new weekend staple.
Whether you are new to plant-based cooking or just looking for a reliable go-to recipe, you are in the right place. This guide walks you through everything step by step, so even if you have never made waffles from scratch before, you will feel confident from start to finish.
By the time you are done reading, you will know exactly which ingredients to use, what consistency your batter should look like, and how to get that golden crunch every single time. No guesswork, no complicated techniques, and no special equipment beyond a basic waffle iron. Just simple, delicious waffles that happen to be completely plant-based. Let's get into it!
Why Most Vegan Waffle Recipes Fall Short
If you've ever pulled open a waffle iron to find a pale, limp, steaming disappointment staring back at you, you're not alone. Vegan waffle recipes fail at a surprisingly high rate, even when you follow the instructions carefully. The problem isn't that plant-based waffles are impossible. The problem is that most recipes skip the "why" and go straight to the "what," leaving you with no way to troubleshoot when things go wrong.
Sogginess is the most common culprit. When a waffle comes out wet and soft instead of crispy, it usually traces back to two things: not enough starch in the batter, and an egg substitute that's adding too much moisture without enough structure to balance it. Conventional eggs contain proteins that firm up under heat, helping the waffle release steam and hold its shape. Without that protein structure, moisture gets trapped inside, and you end up with a waffle that feels undercooked even after several minutes on the iron.
Flatness is a leavening problem. Eggs don't just bind ingredients together; they also trap air and create steam during cooking, giving waffles that satisfying lift and height. Most single-ingredient plant-based swaps only address one of those roles. That's why fluffy, crispy vegan waffles typically rely on a layered approach, combining multiple ingredients to replicate what one egg was doing on its own.
Dense, gummy texture is almost always an overmixing issue. The more you stir a batter, the more gluten develops in the flour. Overdeveloped gluten creates a tight, chewy network that traps air rather than releasing it, and the result is a waffle that's heavy and dense instead of light and open.
The frustration around this is real. Home cooks in vegan communities regularly report multiple failed attempts, even using recipes from well-known sources, with results they'd generously rate a 5 out of 10. One look at the comment sections on popular vegan waffle recipes confirms this isn't an isolated experience.
The solution isn't finding a slightly better ingredient swap. It's understanding the mechanics well enough that every decision you make is intentional, and your results stop being a guessing game.
Vegan Waffle Recipe (Jump to Cook)
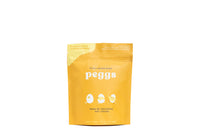
Made by chickpeas, not chicks
This recipe was made with Peggs
$36.00 — Peggs Plant-Based Egg | Vegan, Gluten-Free, Soy-Free
Here's everything you need to get started, all in one place.
Ingredients
Dry ingredients:
1 ½ cups all-purpose flour
2 tablespoons cornstarch
1 ½ teaspoons baking powder
½ teaspoon baking soda
¼ teaspoon salt
1 tablespoon sugar
Wet ingredients:
2 tablespoons Eat Peggs powdered egg substitute + 3 tablespoons water (mixed together first, then added to the batter)
1 cup non-dairy milk (oat, almond, or soy all work great)
1 tablespoon apple cider vinegar
3 tablespoons neutral oil (such as avocado or vegetable oil)
1 teaspoon vanilla extract
Equipment
Waffle iron
Two mixing bowls (one for dry, one for wet)
Whisk
Measuring cups and spoons
Wire cooling rack
Timing and Yield
Prep time: 10 minutes (includes batter rest)
Cook time: 4 to 5 minutes per waffle
Yield: 4 to 6 waffles, depending on your iron size
Before You Start: Key Tips
Pro tips for better waffles:
Rest the batter for 5 to 10 minutes before cooking. This gives the leavening agents time to activate, which means more lift and fluffiness.
Add cornstarch to your dry mix. It is the secret to that crispy, golden exterior you want.
Do not overmix. Stir until the dry and wet ingredients just come together. A few small lumps are completely fine.
Preheat your iron fully before pouring in any batter. A hot iron sets the exterior quickly and prevents sticking.
A Note on Eat Peggs
To substitute one egg in this recipe, mix 2 tablespoons of Eat Peggs powder with 3 tablespoons of water and stir for about 30 seconds until smooth. That's it. No cracking, no refrigeration needed, and no last-minute grocery runs. Because Eat Peggs is shelf-stable, you can keep it in your pantry and reach for it anytime a waffle craving strikes. It provides the binding and structure that traditional eggs would, so your waffles hold together beautifully without any compromise on texture. For a deeper look at how this vegan waffle recipe technique works, the method is well-supported across trusted recipe sources.
What Eggs Actually Do in Waffles (And How Chickpea Egg Replaces Them)
Before we talk about substitutions, it helps to understand exactly what eggs are doing in your waffle batter in the first place. Eggs are not just one ingredient; they are four ingredients in disguise, each performing a distinct job that contributes to the final texture, structure, and flavor of your waffle.
Binding is the first function. Eggs hold the batter together so the cooked waffle doesn't fall apart when you lift it off the iron. Without a binder, you'd end up with crumble rather than crispy, sliceable squares. Leavening is the second function. As the egg's liquid converts to steam inside the hot waffle iron, it creates lift from the inside out, giving you that light, airy interior that makes a good waffle feel almost cloud-like when you bite in. Emulsification is the third. The fat in an egg yolk acts as a bridge between the water-based and fat-based components in your batter, distributing everything evenly for a tender, cohesive crumb rather than a greasy or rubbery one. Finally, eggs add richness: a subtle depth of flavor and a golden color that plain flour and water simply can't replicate on their own.
So how does a chickpea-based egg substitute like Eat Peggs handle all four of those jobs?
How Chickpea Protein Steps In
Chickpea-derived ingredients are surprisingly well-matched to egg functions in waffle batter. When hydrated, legume proteins form a binding network that holds your batter together the same way egg proteins do. Chickpea starches and proteins also carry natural emulsifying properties, meaning fat and liquid distribute evenly through the batter without any additional intervention on your part. And just like a conventional egg, the moisture in a reconstituted chickpea egg substitute converts to steam during cooking, providing the lift and open crumb you want in a finished waffle.
What makes chickpea protein especially useful in waffle applications specifically is how it behaves under direct heat. Chickpea protein sets firmly when it hits a hot griddle or waffle iron, which is exactly the behavior you need for a waffle that crisps on the outside and holds its shape when you serve it. This is why egg substitutes made from legumes have become such a reliable choice for griddle-style recipes, not just baked goods.
Powdered vs. Liquid: A Practical Advantage
One thing worth understanding before you start baking is the difference between powdered and liquid egg substitute formats. Liquid formats require refrigeration, have a limited shelf window once opened, and can be harder to measure precisely. A powdered format like Eat Peggs needs no refrigeration, stores for months, and gives you consistent, repeatable results because you're measuring dry powder rather than eyeballing a pour.
That consistency matters more than you might expect. Waffle batter is sensitive; too much liquid and your waffles steam instead of crisp. A powdered substitute lets you dial in the exact ratio every single time.
Conversion Quick Reference
Use this table as your go-to guide whenever a waffle recipe calls for conventional eggs:
Conventional Eggs |
Eat Peggs Powder |
Water to Add |
|---|---|---|
1 egg |
2 tablespoons |
3 tablespoons |
2 eggs |
4 tablespoons |
6 tablespoons |
Simply whisk the powder and water together until smooth before adding to your batter, and you're ready to go. For best results, let that mixture sit for about 30 seconds so the chickpea proteins have a moment to fully hydrate before they get folded into the rest of your ingredients.
The Vegan Buttermilk Trick That Makes Waffles Light and Airy
Here is the single most impactful technique in this entire recipe, and it takes only five minutes: make your vegan buttermilk first, before you touch anything else.
To do it, combine one cup of your chosen non-dairy milk with one tablespoon of apple cider vinegar or fresh lemon juice. Stir it briefly, then set it aside. Within about five minutes, you will notice the milk starting to look slightly curdled or thickened. That is exactly what you want.
What is happening here is genuine food science. The acid from the vinegar or lemon juice reacts with the baking soda in your batter to produce carbon dioxide bubbles. Those bubbles are what create the lift and open, honeycomb-like interior that makes a waffle worth eating. Skip this step, or add the vinegar straight to the dry ingredients without letting it activate first, and you lose most of that leavening power before the batter ever hits the iron. Flat, dense waffles are almost always the result.
Your choice of non-dairy milk also matters more than you might expect. Oat milk and soy milk have higher fat content, which means they curdle more visibly and produce a slightly richer, more full-bodied batter. Almond milk is lighter and curdles more subtly, but it works beautifully if you prefer a more neutral flavor. For a fluffy, reliably airy result, any of the three will do the job.
The reason sequence matters here is simple: the buttermilk needs its full activation window. Make it first, then measure your dry ingredients, prep your egg substitute, and gather everything else. By the time you are ready to combine wet and dry, your vegan buttermilk has done its work and is ready to go.
Step-by-Step: How to Make Vegan Waffles
Now that you understand the ingredients and the science behind them, let's walk through the process from start to finish. Follow these steps in order, and you'll have crispy, golden, perfectly risen vegan waffles every single time.
Step 1: Make the vegan buttermilk
Pour one cup of your non-dairy milk into a small bowl or measuring cup, add one tablespoon of apple cider vinegar, give it a quick stir, and set it aside for five minutes. Do not skip this step. The acid from the vinegar reacts with the baking soda in your dry ingredients to produce carbon dioxide bubbles, and those bubbles are what gives your waffles lift and a light, airy interior. Without this step, your leavening system is incomplete, and your waffles will come out dense.
Step 2: Reconstitute your Eat Peggs
While your buttermilk is doing its thing, whisk your Eat Peggs powder with water according to the conversion ratio on the package. Set it aside for about two minutes before using it. This short rest allows the chickpea-based powder to fully hydrate, which is important because under-hydrated powder won't blend smoothly into your batter. Think of this step as waking up your egg substitute so it's ready to bind, add richness, and support structure once it hits the batter.
Step 3: Whisk the dry ingredients
In a large mixing bowl, whisk together your flour, cornstarch, baking powder, baking soda, salt, and sugar until evenly combined. Of all the dry ingredients, cornstarch is the one that most directly determines whether your waffles turn out crispy or soggy. It absorbs surface moisture during cooking, which promotes a dry, crunchy exterior rather than a steamed, soft one. Don't leave it out, and don't reduce it.
Step 4: Combine wet and dry ingredients
In a separate bowl or large measuring cup, combine your vegan buttermilk, reconstituted Eat Peggs, oil, and vanilla. Pour the wet mixture into the dry ingredients and fold gently with a spatula until just combined. Lumps are completely fine here. Overmixing develops the gluten in your flour, which tightens the batter and produces a chewy, dense waffle rather than a tender, fluffy one. Stop mixing the moment you no longer see dry flour streaks.
Step 5: Rest the batter and preheat your iron
Let the batter rest for five to ten minutes while your waffle iron preheats fully according to the manufacturer's instructions. This rest period allows the leavening agents to activate and the gluten to relax slightly, both of which improve the final texture. The preheat is equally important: a fully hot iron creates an immediate sear the moment batter touches the plates, locking in a crispy exterior. A cool or under-heated iron traps steam instead, giving you a pale, soft result no matter how perfect your batter is.
Step 6: Cook until the steam stops
Pour the batter into the center of your preheated iron, close the lid, and let it cook undisturbed for four to five minutes. Watch for the steam that escapes from the sides of the iron as the waffle cooks. When that steam slows to almost nothing, your waffle is done. Resist the urge to peek early. An unset waffle will stick to the plates and tear in half when you open the iron, which is one of the most common sources of frustration in vegan waffle recipes. Patience here pays off directly in the form of a waffle that releases cleanly and holds its shape.
Pro Tips for Crispy, Fluffy Waffles Every Time
The difference between a waffle that shatters beautifully and one that bends like a sad piece of soggy bread often comes down to technique rather than ingredients. You've already got the right batter. Here's how to finish the job.
Preheat longer than you think you need to. Your waffle iron's indicator light tells you it's warm, not that it's ready. Give it a full extra minute after the light signals go-ahead. A properly scorching-hot iron drives surface moisture off the batter in seconds, which is exactly how that crispy exterior forms. Rushing this step is one of the most common reasons waffles come out pale and soft.
Oil every single waffle, every single time. Even if your iron is non-stick, a light brush of neutral oil or coconut oil on both plates before each pour makes a real difference. It promotes even browning, helps the waffle release cleanly without tearing, and contributes to that golden crust you're going for. A silicone pastry brush makes this quick and easy.
Use a wire rack, and never stack. This one catches people off guard. The moment you stack finished waffles on a plate, steam gets trapped between them and the exterior softens within minutes, undoing everything the cornstarch in your batter was working toward. As cooking pros put it, a wire rack lets air circulate on all sides and keeps that exterior where it belongs: crispy. Single layer only.
Making a big batch? Use your oven. Place finished waffles directly on the oven rack (not a baking sheet, which blocks airflow underneath) at 200 degrees Fahrenheit. According to crispy waffle experts, this low-heat method holds them beautifully without drying them out. It's also a great strategy for meal prep mornings when you're feeding more than one person.
Finally, resist the urge to press the lid down. It feels instinctive, but pressing compresses the batter before it has a chance to set and expand. That airy, open interior you want comes from the batter rising freely into the grid. Let the iron do its thing without interference, and your waffles will reward you for it.
Sweet and Savory Waffle Variations to Try
Once you've nailed the base recipe, the real fun begins. This batter is incredibly adaptable, and a few small tweaks in the wet or dry ingredient bowl completely transform what comes out of the waffle iron.
Sweet Variations
For sweet waffles, the base recipe needs only minor adjustments. Scale back the salt to just a pinch, then customize the wet ingredients to match your flavor goal.
Classic vanilla bean: Add an extra half teaspoon of vanilla extract and a small pinch of nutmeg. The nutmeg adds a warm, almost floral depth that makes plain waffles taste bakery-level special.
Cinnamon sugar: Make the waffles as written, then immediately toss them in a mix of cinnamon and sugar the second they come off the iron. The residual heat helps the coating stick like a churro, and it loses that magic fast, so work quickly.
Blueberry lemon: Fold a small handful of fresh blueberries and one teaspoon of lemon zest directly into the finished batter. The berries burst slightly during cooking and create little pockets of jammy sweetness throughout.
Chocolate chip: Stir a few tablespoons of dairy-free chocolate chips into the batter just before pouring. Simple and wildly satisfying.
Pumpkin spice: Swap two tablespoons of plant-based milk for two tablespoons of canned pumpkin, then add cinnamon, ginger, nutmeg, and a tiny pinch of clove to the dry ingredients. This one is a fall staple for good reason.
Savory Variations
Savory waffles are genuinely underrated, and as 25 savory waffle recipes from Beyond Mere Sustenance shows, they have deep culinary roots going all the way back to medieval cooking. For any savory version, remove the sugar entirely, bring vanilla down to zero, and add one tablespoon of nutritional yeast to your dry ingredients. That nutritional yeast adds a subtle umami backbone that pairs beautifully with bold toppings.
Herb and garlic: Add half a teaspoon each of dried thyme, rosemary, and garlic powder to the dry mix. The result is savory, aromatic, and incredibly versatile.
Cheesy jalapeño: Fold in an extra tablespoon of nutritional yeast and a few tablespoons of diced pickled jalapeños for heat and tang.
Everything bagel: Stir a tablespoon of everything bagel seasoning into the batter and top finished waffles with vegan cream cheese. It genuinely tastes like a bagel in waffle form.
The herb and garlic base also works brilliantly as a bread substitute in a vegan breakfast sandwich. Stack scrambled Eat Peggs, sliced avocado, and fresh greens between two savory waffles for a handheld breakfast that is filling, protein-packed, and far more interesting than toast. Waffle sandwiches are one of the fastest-growing ways people are using savory waffles right now, and once you try it, regular sandwich bread starts to feel a little boring by comparison. For even more inspiration, Serious Eats maintains an excellent roundup of both sweet and savory waffle directions worth exploring.
How to Make These Waffles Gluten-Free
Good news: this entire recipe adapts beautifully to a gluten-free version with just a few small adjustments. If you or someone at your table needs to avoid gluten, here is exactly what to change.
Swap the flour using a 1:1 gluten-free blend. Look for a blend that already contains xanthan gum in the ingredient list. Xanthan gum acts as a binder, mimicking the elasticity and structure that gluten normally provides in batter. Without it, your waffles may crumble or fall apart when you lift them from the iron. Most reputable GF blends sold in grocery stores include it, but it is always worth checking the label before you start mixing.
Add one extra tablespoon of cornstarch. That brings your total to three tablespoons instead of the two in the base recipe. Gluten-free flours absorb moisture differently and tend to produce a softer, more fragile interior crumb. The additional cornstarch acts as a structural reinforcer, helping the waffle hold its shape and stay crispy on the outside rather than going limp as it cools. According to this crispy GF waffle guide, getting that exterior crunch in a gluten-free version is entirely achievable with the right starch balance.
Rest the batter for a full 10 minutes. Batter resting was already recommended in the base recipe, but it becomes non-negotiable here. Gluten-free flours need more time to fully absorb liquid and allow the leavening to activate properly. Skipping this step often results in dense, gummy waffles.
Cook a little longer and wait for the steam to stop completely before opening the iron. Gluten-free vegan waffles are more delicate on the inside, so opening too early is one of the most common reasons they fall apart. Steam stopping is your reliable signal that the interior has fully set. As Heather Dessinger of Mommypotamus notes, gluten-free waffles can absolutely be crispy on the outside and light and fluffy on the inside, but technique matters.
Because this recipe uses Eat Peggs instead of eggs, you end up with something genuinely rare: a waffle that is both egg-free and gluten-free, made with simple pantry ingredients. Reliable recipes that check both allergen boxes at once are surprisingly hard to find in 2026, making this a go-to option for households navigating multiple dietary needs at once.
Meal Prep Guide: Freezing and Reheating Vegan Waffles
This recipe is practically begging to be batch-cooked. On a lazy Sunday morning, double or triple the recipe, cook every last waffle, and you've just set yourself up for effortless breakfasts all week long. Vegan waffles freeze exceptionally well, and when you reheat them correctly, they come back crispy and golden as if they just came off the iron.
The most important step happens before your waffles ever touch the freezer: cool them completely. Set each waffle on a wire rack (not a plate, not a stack) and let them breathe for 20 to 30 minutes. Skipping this step is the number one reason reheated waffles turn out soggy. When warm waffles go straight into a bag, the steam has nowhere to go. It condenses, turns into ice crystals, and soaks right back into the waffle during reheating. A wire rack keeps air circulating underneath so moisture escapes properly.
Once cooled, flash freeze them first. Lay the waffles in a single layer on a baking sheet and slide it into the freezer for 1 to 2 hours. After that, transfer them to a zip-lock bag or airtight container with a small square of parchment paper between each one to prevent sticking. Stored this way, they keep beautifully for up to 3 months.
For reheating, your toaster is the gold standard. One to two cycles on medium-high brings back that satisfying crunch. An oven at 350°F for 8 to 10 minutes directly on the rack works nearly as well. An air fryer at 350°F for 3 to 4 minutes is also excellent. The best way to reheat homemade waffles, according to home cooks who've tested every method, is consistently the toaster or air fryer. Avoid the microwave entirely; it steams the waffle from the inside and produces something closer to a damp sponge than breakfast.
Camping and travel bonus: Because Eat Peggs is shelf-stable and needs no refrigeration, you can pack the powder in your bag for camping trips, RV weekends, or vacation rentals. Wherever you have a waffle iron and a heat source, fresh vegan waffles are genuinely on the menu.
Vegan Waffles vs. Traditional Waffles: How the Nutrition Compares
If you're health-conscious or cooking for someone who monitors their cholesterol, this comparison is worth knowing.
Cholesterol is the most significant nutritional difference between a conventional egg waffle and one made with a chickpea-based substitute like Eat Peggs. Each large egg contains approximately 186mg of cholesterol. A standard waffle recipe using two eggs brings roughly 372mg of egg-sourced cholesterol into the batch before a single other ingredient is added. Chickpea-based egg substitutes like Eat Peggs contain 0mg of cholesterol, so for those monitoring their cholesterol intake, swapping the egg component alone makes a meaningful difference to the overall nutritional profile of the batch.
Protein is worth a closer look. Conventional eggs contribute around 6g of protein per egg, making them a reliable protein source in traditional waffle batter. Chickpea-based substitutes do provide plant protein from legumes, but the exact amount varies depending on the specific product and formulation. Rather than assuming a universal figure, check the nutrition label of whichever product you're using for accurate per-serving protein data.
Saturated fat is generally lower in a plant-based waffle when you pair a chickpea egg substitute with a non-dairy milk, since you're removing both egg yolks and dairy from the equation. That said, total fat in your finished waffle will still depend on how much oil your recipe calls for.
Here's a quick side-by-side snapshot for reference:
Nutrient |
Traditional Waffle (egg + dairy milk) |
Vegan Waffle (Eat Peggs + non-dairy milk) |
|---|---|---|
Cholesterol (egg component) |
~186mg per egg |
0mg |
Protein (egg component) |
~6g per egg |
Varies; check product label |
Saturated Fat (overall recipe) |
Higher (dairy + egg yolk) |
Generally lower |
Values vary based on recipe, portion size, and specific ingredients used.
One trade-off worth noting: conventional eggs supply nutrients like choline and B12 that chickpea substitutes may not fully replicate. On the flip side, chickpeas contribute dietary fiber that eggs simply don't have. Both versions can absolutely deliver delicious, crispy waffles; the nutrition just looks a little different depending on your priorities.
Frequently Asked Questions About Egg-Free Waffles
Can I make waffles without eggs?
Absolutely. A well-constructed combination of a plant-based egg substitute, vegan buttermilk, and cornstarch handles everything eggs normally do: binding the batter, providing lift, and creating that slightly chewy interior beneath a crispy shell. Most people who taste a properly made egg-free waffle genuinely cannot tell the difference, and a recipe rated nearly five stars by hundreds of home cooks backs that up.
What is the best egg substitute for waffles?
You have a few solid options, and each comes with tradeoffs worth knowing.
Flax eggs work reliably. Combine one tablespoon of ground flaxseed with three tablespoons of water, stir, and let it sit for five minutes until it becomes gel-like. It binds well but can add a very faint earthy flavor.
Aquafaba (the liquid from a can of chickpeas) is another popular choice. It whips up nicely and introduces air into the batter. The downside is that you need a fresh can on hand every time you bake.
Powdered chickpea-based egg substitutes like Eat Peggs are the most convenient option. They sit in your pantry indefinitely, mix in seconds, and because they are formulated specifically to behave like eggs, they deliver the most consistent results across batches.
Why are my vegan waffles soggy?
Three culprits cause soggy vegan waffles almost every time. First, skipping cornstarch in your dry mix removes a key crisping agent; cornstarch absorbs moisture and gelatinizes under heat, helping the exterior firm up. Second, placing batter into an iron that has not fully preheated traps steam instead of releasing it, leaving the waffle soft. Third, stacking your finished waffles traps that same steam all over again. Cool them in a single layer on a wire rack instead.
Can I use chickpea flour instead of eggs in waffles?
Yes, and the science supports it. Chickpea flour is naturally high in protein and starches that behave similarly to egg proteins during cooking, providing structure and binding without dairy or eggs. Eat Peggs is made primarily from chickpeas and is specifically formulated to replicate egg function in recipes like this one, which takes the guesswork out of measuring raw chickpea flour.
How much egg substitute equals one egg in waffles?
For Eat Peggs, follow the conversion ratio listed on the packaging for one egg. For a flax egg, use one tablespoon of ground flaxseed combined with three tablespoons of water, rested for five full minutes before adding to your batter.
Can I freeze vegan waffles?
Yes, and they freeze beautifully. Let waffles cool completely on a wire rack first, then arrange them in a single layer on a baking sheet and flash freeze for about an hour. Once solid, transfer them into an airtight container with parchment paper between each waffle to prevent sticking. They keep well for up to three months. Reheat in a toaster or a 350°F oven for about five minutes to bring back the crispiness; the microwave works in a pinch but tends to make them soft.
The Takeaway: Great Vegan Waffles Are About Understanding the Why
The secret to consistently great vegan waffles was never about finding a magic ingredient. It was about understanding the role each ingredient plays. Once you know that cornstarch creates crispiness by absorbing excess moisture, that vegan buttermilk generates lift by activating baking soda, and that resting your batter allows the starches to hydrate properly, every batch becomes predictable rather than a guessing game.
Eat Peggs is the egg substitute powering this recipe, and it earns its place. Made from chickpeas, it comes in a shelf-stable powdered format that needs no refrigeration, mixes in seconds, and performs reliably across waffles, pancakes, baking, and savory cooking. No cracking, no waste, no last-minute grocery runs.
Ready to keep exploring? Check out our complete egg substitute guide, vegan pancake recipe, and vegan scrambled eggs for more plant-based breakfast inspiration. When you're ready to stock your pantry, visit the Eat Peggs product page to grab your first bag.
Now go make a batch, try one of the flavor variations, and tuck a few extras in the freezer. A plant-based waffle habit that fits real life is closer than you think.
Conclusion
Making incredible vegan waffles is simpler than you might think. With the right ingredients, the correct batter consistency, and a few easy techniques, you can achieve that crispy exterior and fluffy interior every single time, no eggs or dairy required.
Here is what to remember: choose your plant-based milk wisely, do not overmix your batter, and let your waffle iron fully preheat before pouring. These small details make a massive difference in the final result.
Now it is your turn. Pull out that waffle iron, gather your ingredients, and make this recipe your own. Try different toppings, experiment with mix-ins, and enjoy the process. Once you nail this recipe, Sunday mornings will never look the same. Drop a comment below and let us know how yours turned out!
Free download
Get the Egg-Free Baking Cheat Sheet
The one ratio to remember, quick conversions, and where to add Peggs — straight to your inbox.
You're in! Grab your cheat sheet below.
Download the cheat sheet